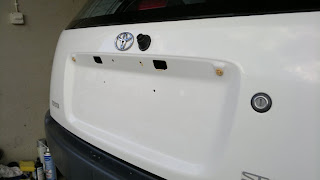
Today I replaced the number plate bulb to a LED light Light Emitting Diode on my Toyota Starlet (EP91). This type of light consumes less power and will last much longer. I also cleaned behind the plastic grab and behind the number plate.
I used Biltema Diodlampor, T10 Wedge, White (replaces W5W with rated power 5W, and socket version W2,1x9,5d, one was broken)
The price for the diode lamap was 90 swedish crones, that is about 15 dollars for two Led lamps.
 |
| Have removed the Plastic cover. Two bults and 2 sliding holder. |
 |
| Have cleaned it and now removed number plate |
 |
| Testing if the LED fits, the lamps are a few milimeters longer, but they fit inside the plastic holders fine. |
 |
| The left light is the original bulb. Soon to be replaced |
 |
| The LED bulb must be connected to the correct polarity, Plus to positive. A little sign on the lamps shows the polarity. And berofe connecting I measured witch cable was plus and minus. The Green was positive, and the white/black negative. |
 |
| This is how it looks from inside. The holes for the number plate bulb holder you can see. |
 |
| Cleaned and painted, Filled the scraches with White 040 color. |
 |
| Here both light emitting diode lamps is in place. |
 |
| Preparing for changing bulb. |
 |
| Light is on, Will continue later. The paint has to dry. |
You will see the finished result in a couple of days.


I can't seem to get the plastic "fake screws" to come out - do you have any advice on pulling them out safely? Do you just need to pull them straight out, or is there some sort of trick to getting them out?
ReplyDeleteHi,
ReplyDeleteI don't understand what you mean? Do you mean the larger plastic cover (that is not is showing in this pictures) sitting over the bulbs? In that case I think you need to slide it of. But perhaps we don't mean the same thing?
I'm talking about the large grey plastic panel on the inside of the hatch - which is seen hanging down from the door in the last photo in your post. It seems to be held in by a set of plastic "screws" - they look like screws, but rotate freely when turned. I've tried pulling them straight out, too - but it's hard to get a good grip on them, and they don't seem to want to budge. Do you have any advice on getting them out / removing that panel without breaking anything?
ReplyDeleteAha, now I get it.
ReplyDeleteWell, I also had some problems with some of the plastic "screws" on that inside cover. This plastic holders are all over the place.. Some of them has problems gripping the threads. I did broke the plastic on one or two. However no problems, I will try to get some "new" of them from a scrapyard to replace them.
Best tip? Hmm. Try to get some thin screwdriver (or needle) in besides the screw and the plastic to get some pressure on the screw upwards so perhaps the screw can be screwed out (very little pressure on the screws while turning the screwdriver). The plastic holding the screw will probably broke unless you get the screws out before you pull it out so be carefull (have patience unlike me).
Good luck :)
As you can see on the last picture, i let it hang cause I couldn't get the plastic screws out, and had already broken one.
ReplyDeleteThanks. So they do actually unscrew, then? I'll have to try again with upward pressure as you suggest.
ReplyDeleteYes, they do unscrew if they find some "grip" in the threads (at least some of mine did). However plastic threads and plastic screw are not the best solution. The threads go bad quite easy.. I have seen better solutions, but I guess it was cheap (for toyota)
ReplyDeleteYes upward pressure from underneath the screwhead (and holding the plastic clip in place at the same time), while screwdriver pressure is very light, and they might find some grip.
Hope it works out for you.